
Military patches signify identity, achievements, and affiliations, essential for uniformity and professionalism. This guide covers regulations and best practices across all branches, ensuring accurate placement.
1.1 Importance of Proper Patch Placement
Proper military patch placement is crucial for maintaining uniformity, professionalism, and adherence to regulations. Patches denote rank, unit affiliation, and achievements, ensuring clear identification and respect for service members’ contributions. Incorrect placement can lead to disciplinary action, as it undermines the integrity of military traditions. Uniform standards vary by branch, but consistency is key to projecting a cohesive and disciplined force. Proper placement also ensures patches are visible and legible, serving their intended purpose. Additionally, it reflects personal and unit pride, fostering esprit de corps. Adhering to guidelines prevents confusion and maintains the historical significance of military insignia, upholding the values of precision and honor.
1.2 Overview of Military Uniform Regulations
Military uniform regulations ensure consistency, professionalism, and adherence to tradition across all branches. These guidelines dictate every aspect of uniform wear, including patch placement, insignia, and attire. Each branch has specific manuals outlining uniform standards, such as the U.S. Army’s updated policy on appearance and grooming. Regulations cover occasions for uniform wear, proper fit, and acceptable modifications. They also address seasonal variations and special duty uniforms. Compliance is mandatory, with deviations potentially leading to disciplinary action. Uniform regulations are regularly updated to reflect modernization and operational needs, ensuring they remain relevant while preserving military heritage. Adhering to these standards fosters unit cohesion and maintains the dignity of military service.
Tools and Materials Needed for Patch Placement
Essential tools include sewing kits, heat-irons, measuring tapes, and fabric glue. These ensure accurate and secure patch attachment on military uniforms, maintaining professional standards.
2.1 Sewing Kits and Supplies
A standard sewing kit is crucial for patch placement, typically including threads, needles, and fabric scissors. These tools allow for precise stitching, ensuring patches are securely attached to uniforms. Additional supplies like thimbles and fabric markers enhance accuracy and prevent errors. For embroidered or woven patches, a sewing kit is often the preferred method, offering durability and a professional finish. Always match thread color to the uniform and patch for a seamless appearance. Proper use of these supplies maintains uniform integrity and adherence to military regulations.
2.2 Heat-Iron and Heat-Transfer Patches
Heat-iron and heat-transfer patches offer a quick, durable method for applying insignia to uniforms. These patches are designed with heat-activated adhesive backing, requiring a heat press or home iron for secure attachment. Proper tools, such as a temperature-controlled iron and heat-resistant tape, ensure even application. Follow specific temperature and pressure guidelines to avoid damaging the patch or fabric. This method is ideal for embroidered or woven patches, providing a long-lasting bond. Always test a small area first to ensure compatibility with the uniform material. Heat-transfer patches are widely used across military branches for their convenience and professional appearance, adhering to strict uniform standards.
2.3 Measuring Tools for Accuracy
Accurate patch placement requires precise measuring tools to ensure uniformity and professionalism. A ruler or seam gauge is essential for aligning patches correctly on the uniform. Calipers can measure small details, while a measuring tape helps with larger areas. Grid paper can be used to map out patch positions before application, ensuring symmetry and proper spacing. Laser measuring tools offer advanced precision for complex layouts. These tools help avoid errors and ensure compliance with military regulations, maintaining a polished and professional appearance. Proper measurement is critical for achieving the exact placement required by uniform standards, reflecting attention to detail and adherence to protocol.
Branch-Specific Patch Placement Guidelines
Each military branch has unique patch placement rules, reflecting their traditions and regulations. Understanding these guidelines ensures uniformity and compliance across all service members’ attire.
3.1 U.S. Army Patch Placement Regulations
The U.S. Army has specific guidelines for patch placement to maintain uniformity and professionalism. Shoulder sleeve insignia are worn on the left shoulder, while unit patches are placed on the left side of the uniform. Rank insignia are positioned on the chest, and combat patches are located on the right shoulder. The American flag patch is worn on the right shoulder, with the flag facing forward. Proper alignment and spacing are critical to meet Army standards. Recently updated regulations emphasize precise measurements and approved materials for patch attachment. Adhering to these guidelines ensures a sharp, professional appearance for all soldiers.
3.2 U.S. Navy Patch Placement Standards
The U.S. Navy has detailed regulations for patch placement to maintain uniformity and tradition. Unit insignia are typically worn on the left shoulder, while rank insignia are placed on the chest or sleeves, depending on the uniform. Combat patches are positioned on the right shoulder, signifying service in designated areas. The American flag patch is worn on the right shoulder, facing forward. Specific guidelines apply to different uniform types, such as the Navy Working Uniform (NWU) and dress uniforms. Proper alignment and spacing are essential to meet Navy standards. Sailors must adhere to these regulations to ensure a professional and consistent appearance across all ranks and units.
3.3 U.S. Air Force Patch Placement Rules
The U.S. Air Force maintains strict guidelines for patch placement to ensure uniformity and professionalism. Unit patches are worn on the left shoulder of the Operational Camouflage Pattern (OCP) uniform, while combat patches are placed on the right shoulder. The U.S. flag patch is positioned on the right sleeve, above the rank insignia. Rank insignia itself is centered on the chest or sleeves, depending on the uniform type. Specific regulations apply to the Propper NWU and other specialized uniforms. Proper alignment and spacing are critical to meet Air Force standards. Airmen are encouraged to use measuring tools and consult official guides to ensure accurate placement and avoid discrepancies.
3.4 U.S. Marine Corps Patch Placement Guidelines
The U.S. Marine Corps emphasizes precision in patch placement to reflect discipline and tradition. Unit patches are worn on the left shoulder of the MARPAT uniform, while combat patches are placed on the right. The U.S. flag patch is positioned on the right sleeve, above the rank insignia. Rank insignia is centered on the chest or sleeves, depending on the uniform type. Specific guidelines apply to the Dress and Field uniforms. Proper alignment and spacing are critical to meet Marine Corps standards. Marines are encouraged to use measuring tools and consult official guides to ensure accurate placement and avoid discrepancies.
3.5 U.S. Coast Guard Patch Placement Regulations
The U.S. Coast Guard adheres to specific patch placement rules to maintain uniformity and professionalism. Unit patches are worn on the left shoulder of operational uniforms, while combat patches are placed on the right. The U.S. flag patch is positioned on the right sleeve, above the rank insignia. Rank insignia is centered on the chest or sleeves, depending on the uniform type. The Coast Guard also allows for morale patches under certain conditions. Proper alignment and spacing are critical to meet regulations. Members are advised to consult official guides and use measuring tools to ensure accurate placement and avoid discrepancies.
3.6 U.S. Space Force Patch Placement Standards
The U.S. Space Force (USSF) has established specific guidelines for patch placement to maintain a cohesive and professional appearance. Unit patches are worn on the left shoulder of the operational uniform, while occupational badges are centered on the chest. The U.S. flag patch is positioned on the right sleeve, above the rank insignia. Rank insignia is centered on the chest or sleeves, depending on the uniform type. The USSF also allows for morale patches under certain conditions. Proper alignment and spacing are critical to meet regulations. Members are advised to consult official guides and use measuring tools to ensure accurate placement and avoid discrepancies.

Types of Military Patches and Their Placement
Military patches include combat, unit, rank, flag, morale, and name tape patches. Each type has specific placement rules to ensure uniformity and adherence to regulations.
4.1 Combat Patch Placement
Combat patches are worn on the left sleeve of the uniform, typically 1/2 inch below the shoulder seam. They represent a soldier’s participation in combat operations. The placement must align with uniform regulations to maintain professionalism and consistency. Proper positioning ensures the patch is visible and respects the soldier’s service. Always refer to branch-specific guidelines for exact measurements and placement instructions. Incorrect placement can lead to uniform discrepancies, so attention to detail is crucial. This section provides clear guidance to ensure combat patches are displayed accurately and proudly.
4.2 Unit Patch Placement
Unit patches are placed on the left sleeve of the uniform, typically 1/2 inch below the shoulder seam, representing the soldier’s current or former unit. The patch should be centered and aligned with the sleeve’s edge. For combat uniforms like OCP, the patch is positioned 1/2 inch below the Velcro for rank. In dress uniforms, it is sewn directly onto the sleeve. Ensure the patch does not overlap with other insignia. Proper placement reflects unit identity and adherence to military standards. Always consult branch-specific regulations for precise measurements and placement guidelines to maintain uniformity and professionalism across all personnel.
4.3 Rank Insignia Placement
Rank insignia placement varies by uniform type but generally appears on the chest, sleeves, or collar. On OCP uniforms, rank is centered 1/2 inch above the name tape. For dress uniforms, rank insignia is pinned or sewn on the chest, aligned with the wearer’s eye level. Sleeve rank placement is common in some branches, positioned midway between the shoulder and elbow. Ensure proper spacing between rank and other insignia, such as unit patches or badges. Use branch-specific guidelines for precise measurements. Correct placement maintains professionalism and uniformity, reflecting the wearer’s rank clearly. Always consult official regulations for accurate positioning and adherence to standards.
4.4 Flag Patch Placement
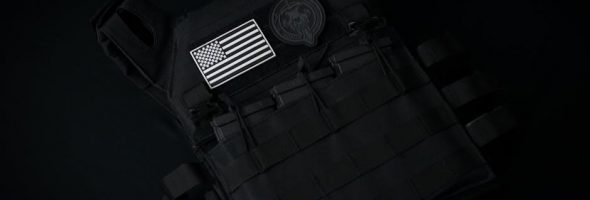
The flag patch is typically placed on the right sleeve of the uniform, 1/2 inch below the shoulder seam. The flag faces the wearer’s right, with the canton (stars) on the left. On OCP uniforms, it’s centered 1/2 inch above the American flag or unit patch. For dress uniforms, the flag patch is usually positioned on the chest, aligned with the wearer’s right side. Ensure the flag patch does not overlap with other insignia. Proper orientation and placement are crucial to maintain uniformity and respect for the flag. Always refer to branch-specific regulations for precise measurements and positioning guidelines to avoid errors.
4.5 Morale Patch Placement
Morale patches are optional and used to express individuality or unit spirit. They are typically placed on the front or sleeve of the uniform, avoiding areas reserved for official insignia. On OCP uniforms, they are often positioned on the chest or upper sleeve, ensuring they do not cover rank or unit patches. For dress uniforms, placement is more restricted, usually on designated areas like the pocket or shoulder. Always check branch-specific guidelines, as some restrict morale patches to certain uniforms or situations. Proper placement maintains professionalism while allowing personal expression. Ensure patches are securely attached and do not detract from the uniform’s formal appearance or official insignia.
4.6 Name Tape and Rank Patch Placement
Name tapes are placed on the right side of the uniform, centered above the right breast pocket, aligned with the top of the pocket. Rank patches are positioned on the center chest, above the name tape, and on the sleeves for NCOs and officers. Enlisted ranks are worn on the upper sleeve, while officer ranks are placed on the shoulder. Name tapes and rank patches must be securely attached, either sewn or heat-sealed, to maintain uniformity and professionalism. Proper alignment and spacing are crucial to avoid overlapping with other insignia. Always refer to branch-specific guidelines for precise measurements and placement requirements to ensure compliance with military regulations and maintain a sharp, polished appearance.
Uniform-Specific Patch Placement Guides
Uniform-specific guides ensure patches are correctly placed on OCP, BDU, dress, and field uniforms, adhering to branch regulations for a professional and standardized appearance.
5.1 OCP (Operational Camouflage Pattern) Uniform Patches
OCP uniforms require precise patch placement to maintain uniformity and professionalism. The U.S. Army mandates specific locations for unit patches, U.S. flag patches, rank insignia, and name tapes. Patches must align with uniform seams and follow standardized measurements. Sewing or heat-iron application is recommended for durability. Ensure all patches comply with AR 670-1 guidelines. Proper placement reflects unit identity and adherence to military standards. Always use approved materials and tools for accurate positioning. Updates to OCP patch placement are outlined in the latest Army Directive on uniform wear standards. Adhering to these regulations ensures a polished and correct appearance for all service members.
5.2 BDU (Battle Dress Uniform) Patch Placement
BDU uniforms require specific patch placement to maintain military standards. Unit patches are positioned on the left sleeve, 1/2 inch below the shoulder seam. The U.S. flag patch is placed on the right sleeve, aligned with the uniform’s edge. Rank insignia is centered on the collar, 1/4 inch above the collar seam. Name tapes are placed above the right breast pocket, aligned with the top of the pocket. Ensure all patches are securely sewn or heat-ironed. Adhere to AR 670-1 guidelines for proper placement. While BDUs are being phased out, understanding their patch placement remains relevant for historical and specific contexts. Always follow precise measurements for a professional appearance.
5.3 Dress Uniform Patch Placement
Dress uniforms require precise patch placement to maintain a polished appearance. The U.S. flag patch is centered on the right sleeve, 1/2 inch below the shoulder seam. Unit patches are placed on the left sleeve, aligned with the flag patch. Rank insignia is centered on the shoulder straps, 1/4 inch from the edge. Name tapes and rank patches are positioned above the right breast pocket, aligned with the top of the pocket. Ensure all patches are securely sewn to prevent shifting. Follow AR 670-1 guidelines for exact measurements. Proper placement enhances professionalism and adherence to military standards. Always double-check alignment before wear to maintain a sharp, uniform look.
5.4 Field Uniform Patch Placement
Field uniforms prioritize functionality while maintaining regulation standards. The U.S. flag patch is centered on the left sleeve, 1/2 inch below the shoulder seam. Unit patches are placed on the right sleeve, mirroring the flag patch’s position. Rank insignia is worn on the chest, centered above the name tape. Name tapes and rank patches are positioned above the right breast pocket, aligned with the top edge. Combat patches are placed on the left sleeve, 1/2 inch below the unit patch. Ensure all patches are securely attached using heat or sewing. Proper placement enhances identity and unit cohesion in operational settings. Adhere to specific branch guidelines for exact measurements and positioning to maintain uniformity and professionalism.
Updating and Maintaining Patches
Regularly update patches to reflect current assignments and achievements. Transfer patches to new uniforms carefully, ensuring correct placement. Replace worn or faded patches promptly to maintain uniform appearance and professionalism.
6.1 Seasonal and Temporary Patch Updates
Seasonal and temporary patches require careful handling to maintain uniform standards. These patches, often used for special events or deployments, should be applied and removed without damaging the uniform. Use heat-activated adhesive for temporary patches, ensuring they are centered and aligned properly. After removal, inspect the area for residue and clean as needed. Always follow branch-specific guidelines for temporary patches to avoid uniform discrepancies. Proper storage of these patches when not in use prevents wear and tear, ensuring they remain serviceable for future events. Regular updates keep uniforms current and compliant with regulations.
6.2 Transferring Patches to New Uniforms
Transferring patches to new uniforms requires precision to maintain their integrity and placement accuracy. Start by carefully removing the patch from the old uniform, ensuring no adhesive residue remains. For sewn-on patches, use scissors to cut the stitching, then reattach using a sewing kit. Heat-transfer patches can be reactivated with a heat iron, but test a small area first to avoid damage. Measure the placement on the new uniform to match the original positioning. Use a ruler or template for alignment. Avoid stretching or wrinkling the fabric during transfer. For intricate designs, consider professional tailoring. Proper transfer ensures a sharp, professional appearance.
6.3 Proper Disposal of Old Patches
Proper disposal of old military patches ensures respect for their significance and prevents unauthorized use. For fabric patches, consider donating to veteran organizations or recycling programs. Embroidered patches can be repurposed for craft projects. Heat-transfer patches should be disposed of carefully, as their adhesive may remain active. Avoid leaving patches in public areas or tossing them in open trash. Instead, place them in sealed bags or envelopes for secure disposal. If patches are damaged beyond repair, render them unrecognizable before discarding. Always follow unit or organizational guidelines for disposal. Proper handling maintains the dignity of military insignia and prevents potential misuse.
Common Mistakes to Avoid
Avoid incorrect patch placement, improper heat-iron use, and mixing incompatible patch types. Ensure accuracy by following branch-specific regulations and using proper tools for secure attachment.
7.1 Incorrect Placement of Rank and Unit Patches
Incorrect placement of rank and unit patches is a common mistake that can lead to non-compliance with military regulations. Each branch has specific guidelines for where these patches should be positioned. For example, in the U.S. Army, rank patches are typically placed on the upper torso, while unit patches are positioned on the shoulder. Misaligning these can result in a uniform that does not meet standards. It is essential to refer to official branch-specific regulations to ensure accurate placement. Using measuring tools and sewing guides can help prevent errors. Always double-check the placement before finalizing to maintain professionalism and adherence to military protocols.
7.2 Improper Use of Heat-Iron for Patches
Improper use of heat-iron for patches can damage uniforms and compromise their appearance. Common mistakes include using excessive heat, not placing a cloth barrier, or applying heat for too long, which can scorch fabric or melt patch backing. Always use the correct temperature setting and a pressing cloth to protect both the patch and uniform. Failure to follow these steps can result in patches peeling off or leaving permanent marks. Proper heat-iron techniques are crucial for maintaining professional standards. Refer to manufacturer guidelines and practice on scrap fabric before applying patches to ensure a flawless finish. Avoiding these errors ensures long-lasting, regulation-compliant results.
7.3 Mixing Incompatible Patch Types
Mixing incompatible patch types can lead to uniform damage or non-compliance with regulations. For example, combining embroidered patches with PVC patches may cause uneven wear or adhesive failure. Always ensure patches are made from compatible materials and designed for the same uniform type. Improper combinations can result in peeling, discoloration, or even damage to the fabric. Check official guidelines for approved patch types and materials. Using mismatched patches can undermine professionalism and lead to disciplinary action; Proper selection and placement are essential for maintaining a sharp, regulation-compliant appearance. Avoid mixing patches from different manufacturers without verifying compatibility. Adhere to branch-specific standards to prevent issues.
Maintenance and Care of Patches
Regular cleaning and proper storage extend patch longevity. Avoid harsh chemicals, use mild detergents, and air-dry. Store patches separately to prevent damage and fading over time.
8.1 Cleaning and Preserving Patches
Properly cleaning and preserving military patches ensures their longevity and maintains their appearance. Use mild detergents and cold water for embroidered or fabric patches, avoiding harsh chemicals. For heat-sealed patches, avoid soaking, as it may loosen the adhesive. Gently hand-wash patches and air-dry them to prevent shrinkage or fading. Avoid using abrasive materials or scrubbers, as they can damage embroidery or surfaces. For stubborn stains, apply a small amount of detergent directly and rinse thoroughly. Store patches in a cool, dry place, away from direct sunlight to prevent fading. Regular maintenance ensures patches remain crisp and vibrant, adhering to military standards.
8.2 Storing Patches When Not in Use
Proper storage of military patches ensures they remain in pristine condition when not in use. Store patches in a cool, dry environment, away from direct sunlight to prevent fading. Use airtight containers or sealed plastic bags to protect against moisture and dust. Place each patch in an individual compartment or wrap them in acid-free tissue paper to avoid sticking. For embroidered patches, consider using protective covers or sleeves. Organize patches by type or branch for easy access. Avoid folding or creasing patches, as this can cause permanent damage. Regularly inspect stored patches for signs of wear or pests. Proper storage maintains their integrity and readiness for future use.
Mastering military patch placement ensures uniformity, professionalism, and adherence to regulations. Proper placement honors service, identity, and achievements, maintaining the integrity of military traditions and standards.
9.1 Final Tips for Accurate Patch Placement
For precise patch placement, always refer to official branch guidelines and use measuring tools. Iron-on patches require careful heat application to avoid damage. Sewing is recommended for durability. Ensure patches align symmetrically and maintain uniformity across all garments. Regularly inspect patches for wear and tear, replacing them as needed. Practice on an old uniform before applying patches to a new one. Seek guidance from experienced personnel if unsure. Attention to detail reflects professionalism and respect for military traditions. By following these tips, you can achieve accurate and regulation-compliant patch placement every time.
9.2 Resources for Further Reading
For in-depth understanding, consult official military branch websites and uniform regulations. The U.S. Army’s latest directive on appearance and grooming provides updated standards. Online guides offer diagrams and step-by-step instructions for precise placement. Check official sources regularly for policy updates. Additionally, military supply stores often provide detailed patch placement charts. Engage with military forums and communities for shared experiences and tips. Utilize these resources to stay informed and ensure compliance with the latest guidelines. Proper patch placement is a reflection of military pride and discipline, making these resources invaluable for maintaining standards.